Inspired by conversations on the Food52 Hotline, we're sharing tips and tricks that make navigating all of our kitchens easier and more fun.
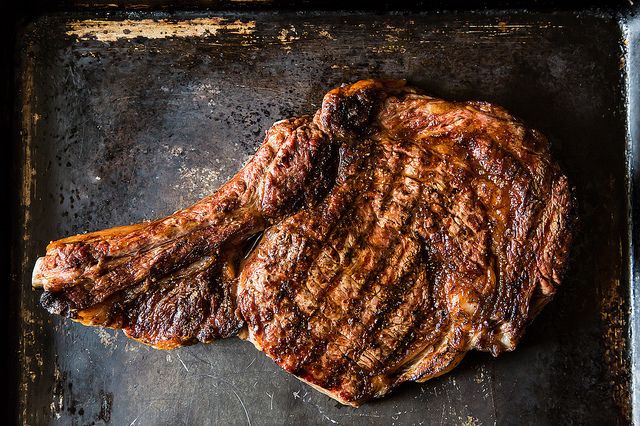
Today: Go ahead, show off a little -- with grill marks like these, you'll secure your place over the fire for good.
Summer begins and ends by the grill. Starting Memorial Day, it's the cornerstone of every long weekend, every party, and every easy weeknight dinner until the leaves begin to turn and we (begrudgingly) start wearing pants again.
In theory, grilling is fun, easy-going -- the way summer should be. In reality, we take grilling pretty seriously. We grant certain people grill privileges (and revoke them from others), we accessorize with fancy tools, and we develop highly individualized techniques for cooking to temperature. The truth is, once the grill is fired up, we rarely let it out of our sight.
Now that we're well into grilling season, it's time to show off a little. Perfect the art of grill marks, and you'll secure your place over the fire for good. Here's how to do it.
Before you light your grill, heed these five tips:
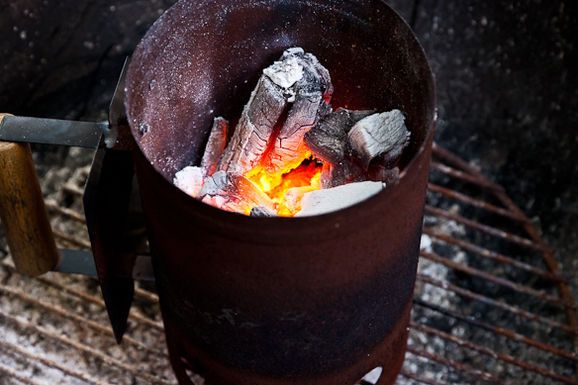
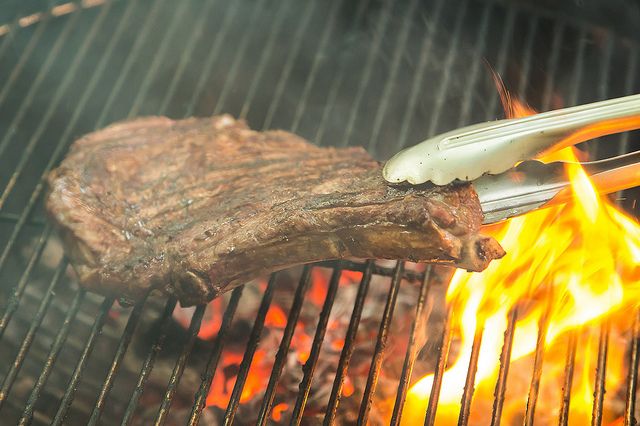
1) The first step to a great sear is a hot grill. Let it heat up for at least 10 minutes before you start cooking. This will ensure that grill marks will start forming right away on your meat (or whatever else you're grilling). Because your grill will need to be hot enough to brand the meat from the get-go, you'll also want to create two heat zones -- one very hot, and one cooler -- so that once your marks form, you can move the meat to the cooler section to finish cooking.
More: Go beyond steak -- check out our community's favorite recipes for grilled vegetables.
2) Keep the grill clean. Dirty grates will lead to messy, undefined marks that will make nobody proud. The best way to clean the grates is once they're hot and any leftover char has been carbonized -- in this state, it will be easy to brush off any debris from their surface.
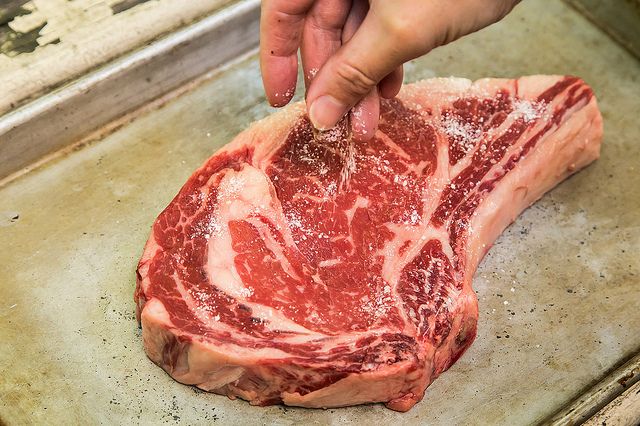
3) Avoid sticky situations. To prevent your meat from sticking to the grill, dress it with some oil first -- or apply the oil directly to the grates themselves. Seasoning the meat just before placing it on the grill can also help prevent sticking.
More: Don't spend your paycheck on a rack of ribs. Here's how to grill on a budget.
4) Step away from the meat. Once you place the meat on the grill, leave it alone until the first stage of cooking is over. Moving your meat around too much will prevent you from achieving those gorgeous grill marks; it will also prevent the meat from caramelizing and cause all of its lovely juices to escape.
5) Know your meat. When you're familiar with the required cooking times and temperatures for what you're grilling, you'll have a better idea of when to flip it, move it, and take it off the grill. You'll have not only a beautiful finished product, but also a tasty one.
Now that you're prepared, here's how to achieve perfect grill marks:
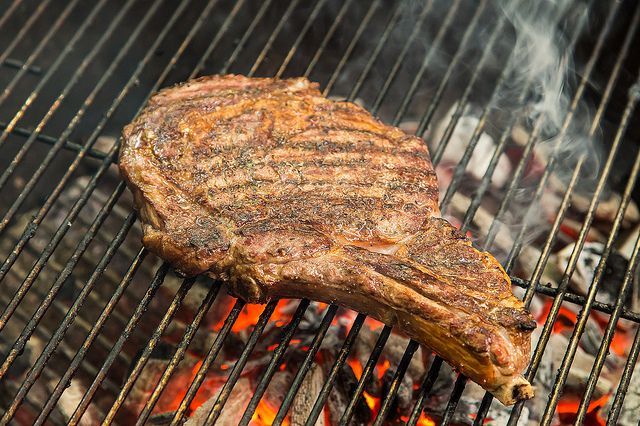
There are two methods for making grill marks: the single strip and the cross-hatch. It's up to you which effect you prefer -- at this point, we're purely talking aesthetics (and how much you'd like to show off).
Either way, you'll have the best results with a precise slice of meat with a flat surface, like sirloin steak or filet, so that its face presses entirely against the hot grates; it's not as easy to achieve this effect if you're grilling whole brisket, flank, or tenderloin, for example, since the overall surface contact is limited. Bones can also get in the way of a perfectly defined sear, although that clearly didn't stop us here.
For a single strip:
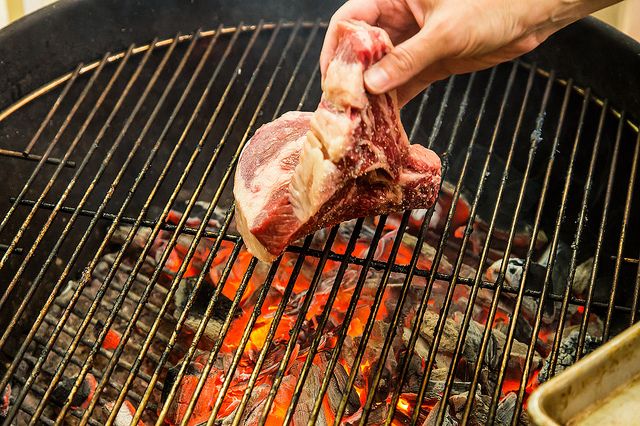
- To start either method, place the meat in your hot zone at a 45 degree angle to the grates -- you want the marks to form diagonally on the meat's surface. After about 1 to 2 minutes, the sear should form single strip marks on the meat.
- If you're not going to create the cross-hatch, simply flip the meat over to achieve the same marks on the other side. To finish it, move the meat to the cooler zone and cook it to your desired temperature.
For a cross-hatch:
- Start the same way as the single strip, with the meat at a 45 degree angle to the grates, searing it for 1 to 2 minutes.
- Once the first sear is formed, rotate the meat to a 90 degree angle without flipping. This will create the cross-hatch effect on the first side.
- To finish, repeat the same process on the other side of the meat, then move it to the cooler side of the grill until it's cooked to your liking.

Voilà! You've done it. Now, go ahead -- impress someone this summer.
How do you like to grill your steak? And what do you serve it with? Let us know in the comments!

The Dynamite Chicken cookbook is here! Get ready for 60 brand-new ways to love your favorite bird. Inside this clever collection by Food52 and chef Tyler Kord, you'll find everything from lightning-quick weeknight dinners to the coziest of comfort foods.
Order Now
See what other Food52 readers are saying.